Navigating the World of Printers and Copiers: A Guide for Office Managers with Actionable Steps

Hello!
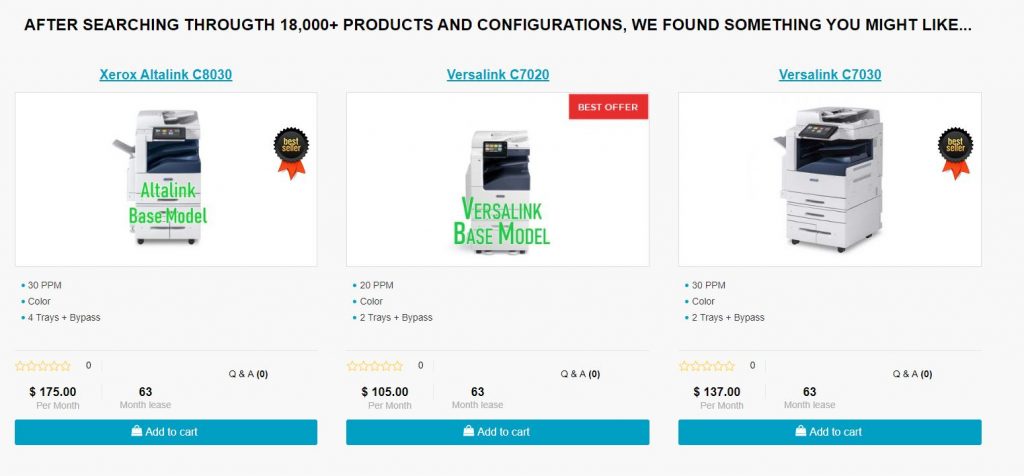
As an manager, boss, executive, or decision maker, selecting the right printer or copier is crucial for your team’s success. This guide will prepare you for a productive discussion with our sales team, ensuring you choose the best print solution for your needs.

Action Step #1:
Compile a list of your current printing and copying challenges to discuss with our sales rep later on.

Understanding Your Printing Needs:
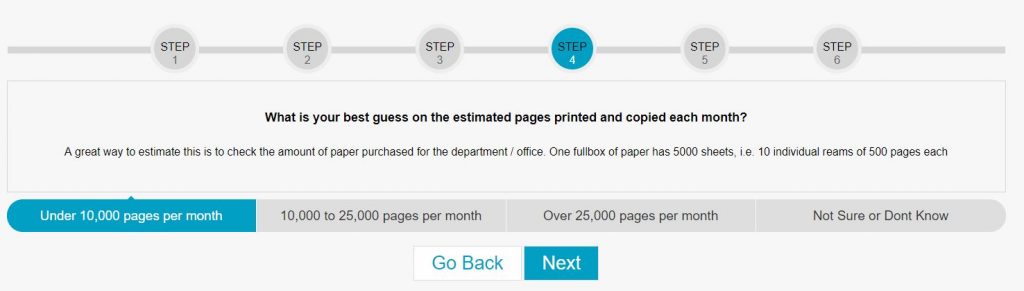
Assess your office’s printing volume and requirements. Do you need to print in high volumes or occasional documents? Are they primarily text-based or graphic-heavy?

Action Step #2:
Track your office’s printing habits for a week to get a clear picture of your needs. (This will also help figure our your estimated monthly print volume.)

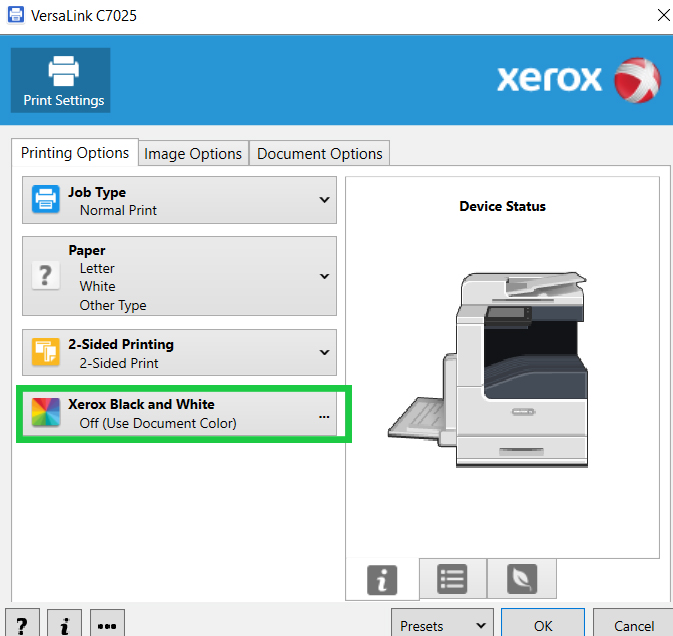
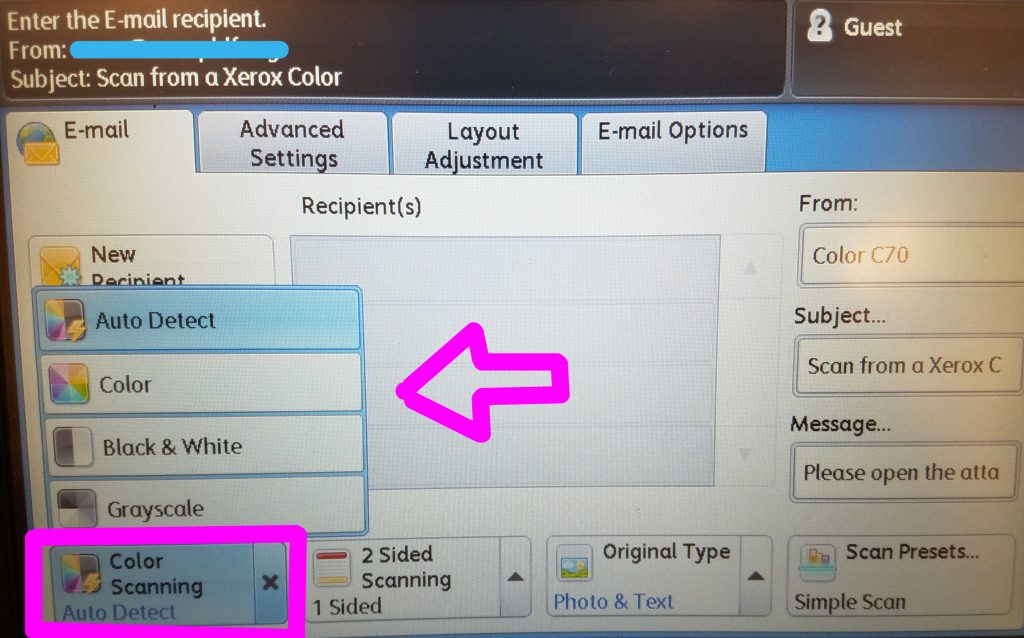
Color vs. Black and White Printing:
Determine if color printing is essential for your office. Color is great for marketing, while black and white suffices for regular documents.

Action Step #3:
Review your recent print jobs to decide if color printing is a frequent necessity.

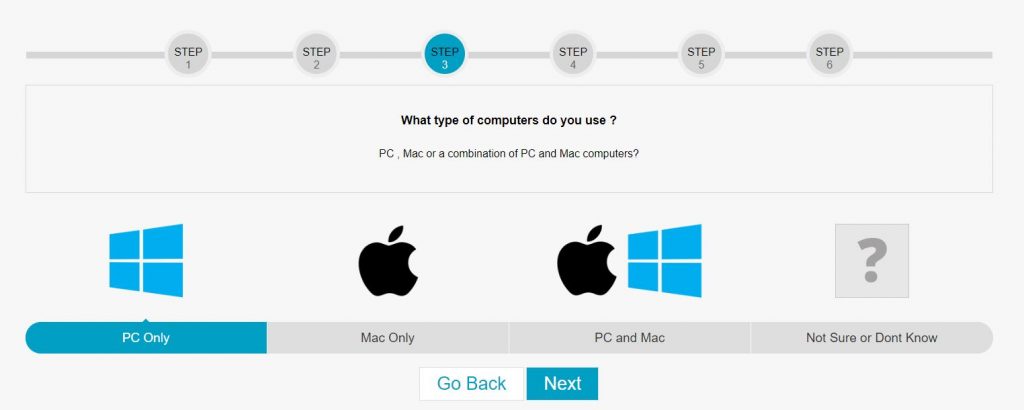
Media Handling and Versatility:
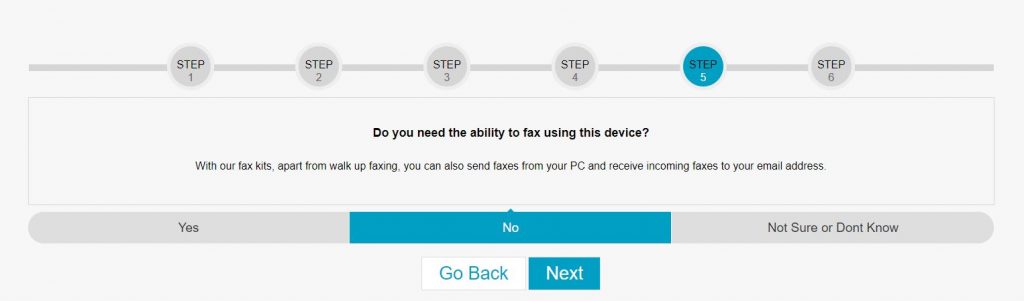
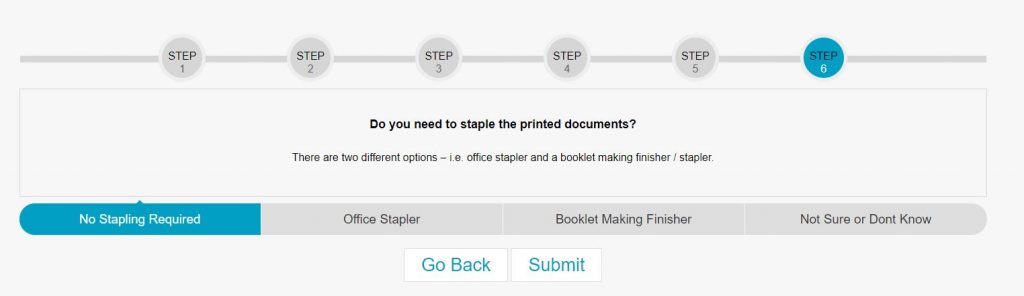
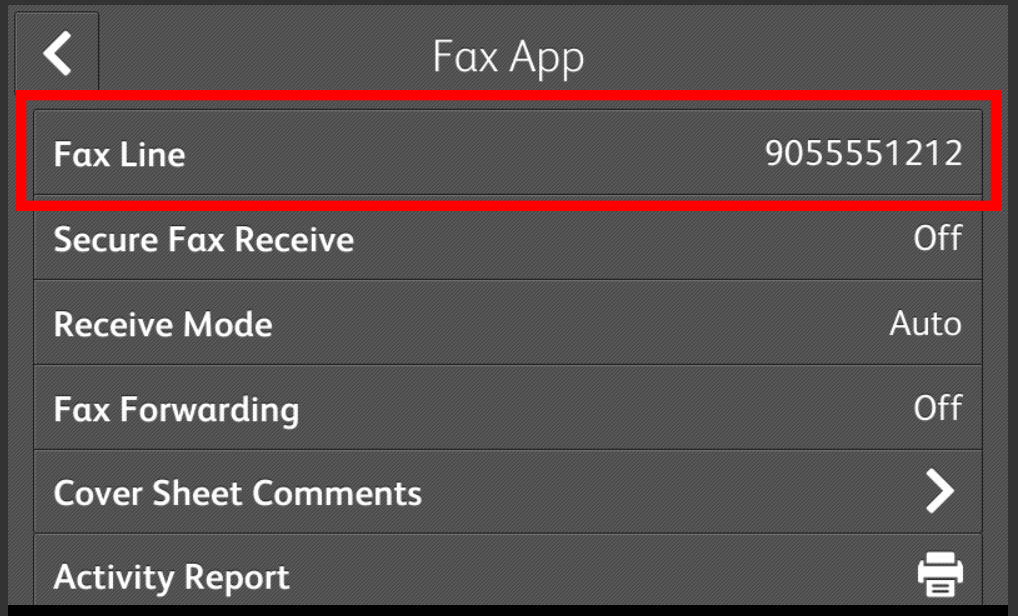
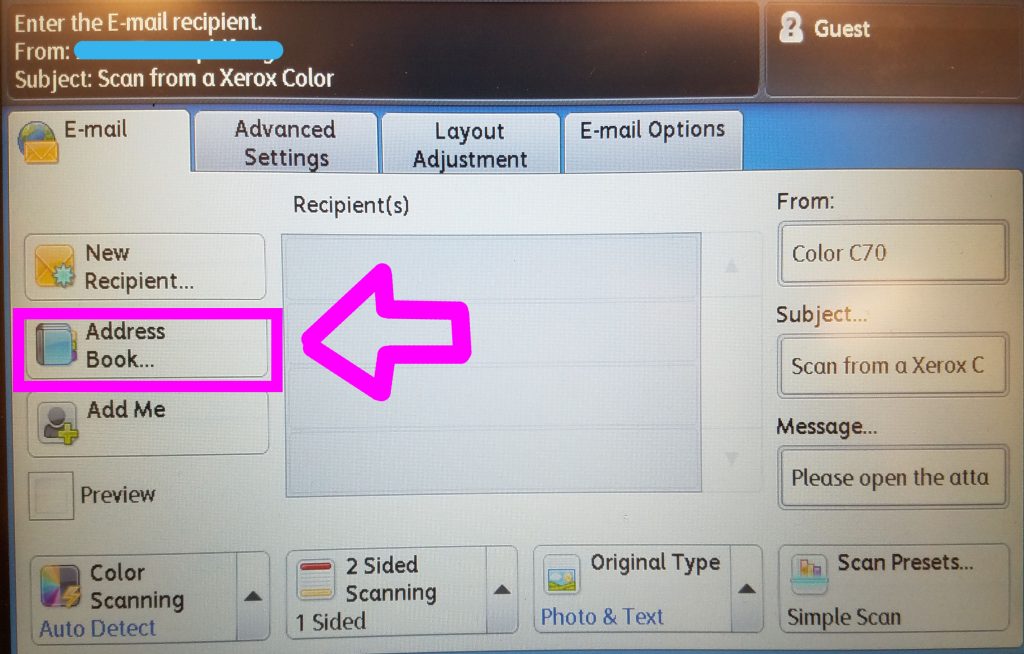
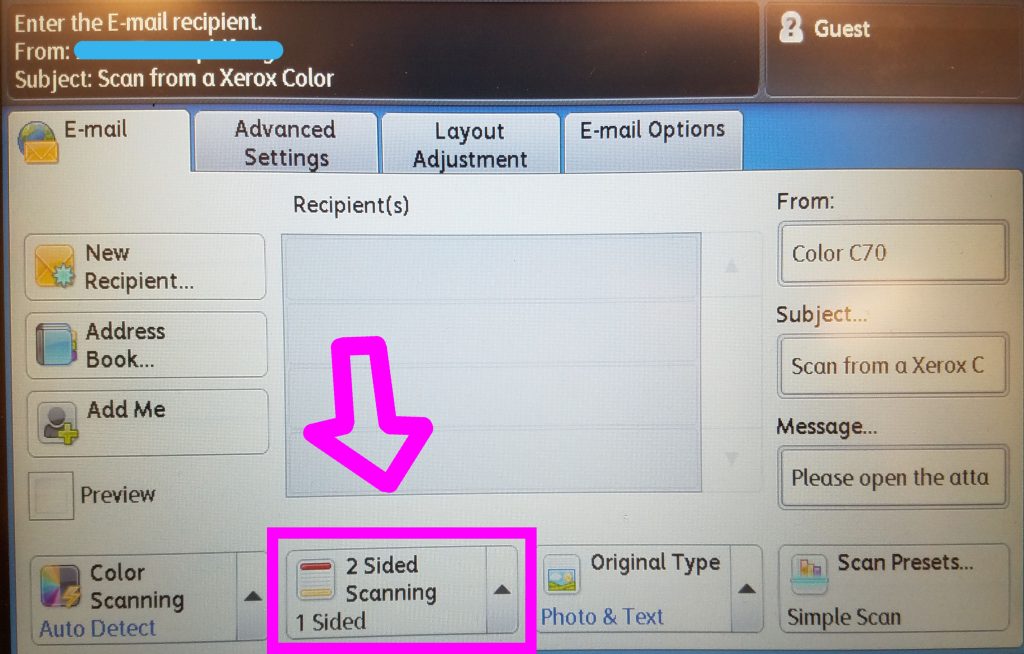
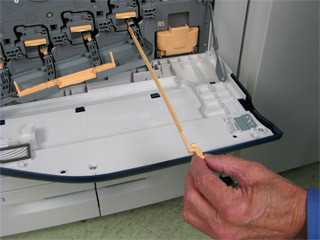
Your office may need a versatile printer for different paper sizes and types. Also, consider if duplex (double sided) printing, scanning, and faxing are necessary. Stapling, hole-punching, and folding are also available options.

Action Step #4:
Make a list of the various paper sizes and types your office uses regularly.

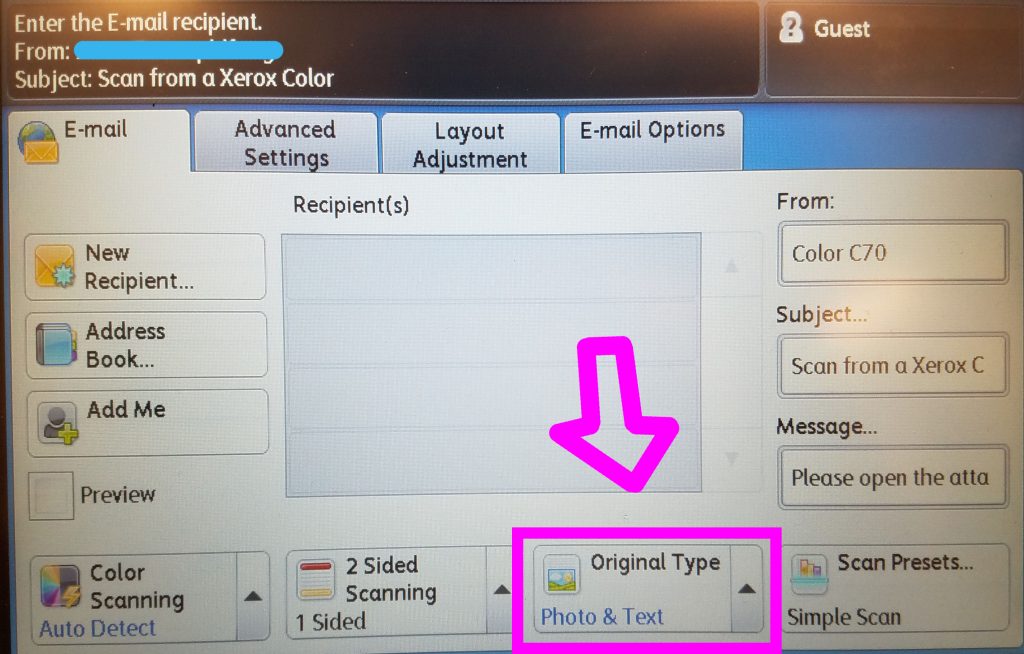
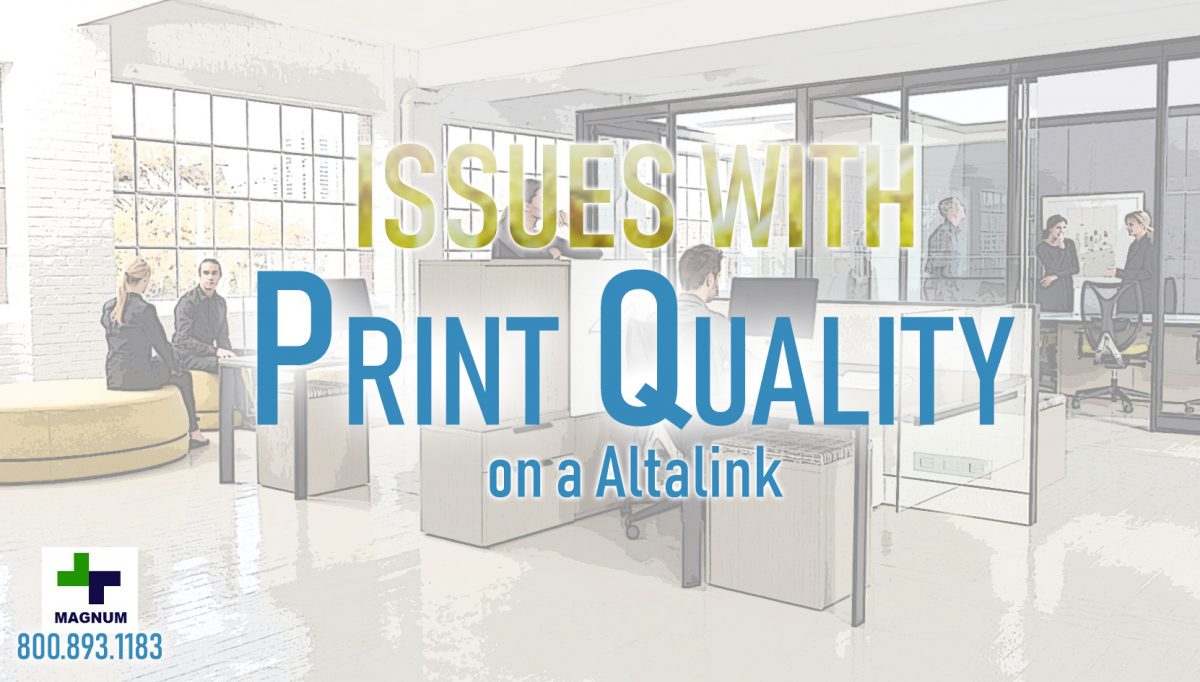
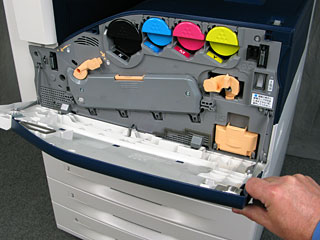
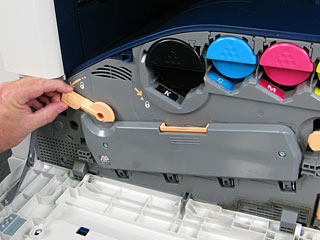
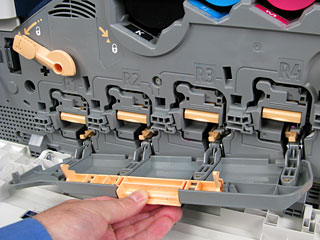
Print Quality and Resolution:
High-quality print is vital for professionalism in some instances. Think about the resolution specifications to ensure clarity in your documents. Is higher definition necessary for your office?

Action Step #5:
Gather samples of different print quality levels from your current printer to compare with your sales rep.

Cost Considerations:
This boils down to purchase or lease. Consider both the initial cost and long-term expenses like ink, maintenance, and repairs vs. the all inclusive maintenance plans that usually come with leases.

Action Step #6:
Calculate your current monthly printing expenses to be able to compare with potential new options.

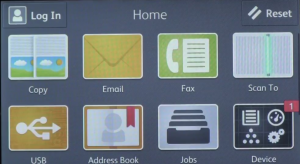
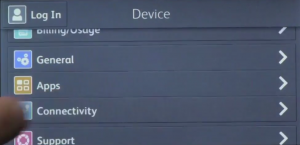
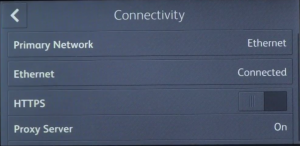
Connectivity and Ease of Use:
Modern printers offer connectivity options like Wi-Fi, enhancing efficiency and mobile device printing.

Action Step #7:
Check your office’s network capabilities with your I.T. department.

Security Features:
In an era of digital threats, printer security is crucial. Look for secure printing, user authentication, and data encryption.

Action Step #8:
Review your office’s data security protocols and identify any gaps that a new printer needs to fill and address.

Environmental Impact:
Eco-friendly printers can reduce your office’s environmental impact and save on energy costs.

Action Step #9:
Is an energy-efficient printers necessary for your office?

Conclusion:
Choosing the right printer or copier is essential. By taking these steps, you’ll be well-equipped for a meaningful discussion with our sales team.

Action Step #10:
Schedule a meeting with our sales team, armed with your findings and questions. You can contact us at online@usamagnum.com

Contact us for a personalized consultation to boost your office’s productivity and efficiency.

Default Passwords for Xerox Copier for 2020:


   Welcome to the Blog about Default Passwords for Xerox Copier for 2020. Thank you for visiting our page, below we are going to talk about that and hopefully provide you with a better understanding of how to access your default passwords .”

Xerox allows you to log into the system administrator area. Here you can access and change the default features according to your requirements. It is accompanied with many security features, admin panel with username and admin password. You need to log in to the system administrative mode to change anything.

The rules for handling default passwords has changed in January 2020. The firm wares updated to make the default passwords either 1111 or devices serial # to add reasonable security features to the devices. As the California state law  (SB-327) will not allow to sell products connected to the internet without security features from January 1, 2020 onward. So, Xerox has to amend its security features to be bound by it. So, you should change your system admin password to make your system secure. It is always recommended to change the admin password.

You can use this page www.support.xerox.com for help changing the password. The users who already are using printers or MFPs have the same default password until they upgrade the software/firmware. After updating the old software to the new updated one, you need to change the default password and keep it secured and safe and accessible by limited users you trust to make further use. If you forgot the changed password you need to get help from our technician to reset the password. There is no way to reset or access the password remotely, so the technician needs to visit your place for password reset.

Benefits of changing the admin password or credence:

Changing the password will also protect the printer/multi function printer from security issues. The password needs to be remembered to keep your device secured. It’s always advisable to log out of the system admin mode for the safety and security of the printer. The default access allows everyone to access the basic Copy, Scan, Print, & Fax functions of a device. But the administrative mode has more features like : various advanced accounting, security and configuration features, network parameters and changing specific default modes.

Changing passwords at your earliest convenience is needed for the safeguard of your system and to protect your device from online threats. You will explore more advanced features if you logged in to the admin panel. 

Get in touch with us today and we would provide you with the best copiers you need for your business.


Looking for actual prices? Go to our home page @ www.usacopierlease.com

or

The model below is our most commonly leased.


ABOUT USA Copier Lease

USA Copier Lease is an exclusive Xerox dealer and our clients are across the United States.

We can service and support your Xerox devices anywhere in the United States with a guaranteed same day / next day on-site service guarantee.

In addition, to learn more about how USA Copier Lease can help your organization assess your existing copier leases or provide a quote for new copier, call (800) 893 1183 or send an email to online@usamagnum.com

If you have read this far and are an IT organization looking for a Xerox Partner to pass referrals to, Contact us. We provide great incentives for copier referrals past.

How to Use a Copy Machine


   Welcome to the Blog about how to use a copy machine. Thank you for visiting our page, below we are going to talk about that and hopefully provide you with a better understanding of a copy machine and all it does.” 

Xerox copiers provide the best features for copying in cost effective price with advanced security modules,easy to access tools, mobile connectivity, WiFi service, cloud connected applications, touch screens, etc. It’s not a headache any more to know how to use a copy machine. All instructions with pictures and videos are available on our website. You can go through the videos to see how easy the printing job is. Some MFP printers have more smart features and also come with lifetime warranty.

Steps to handle a copy machine:

Step 1 : First you have to switch on the power button and it may take a few seconds to make the machine ready for work. Then touch the “Press it” button on the touch pad. Now your machine is on.

Step 2 : Loading the paper in the tray : Open various trays one by one to load papers of different size i.e. A4 (Normal Size), A3 or Legal size. If your printer has just one tray you have to insert papers according to your printing preferences. But printers with various trays for loading different size papers are best for multi functions.

Step 3 : Follow the Screen Instructions to know the various Function buttons. You have to choose how many copies you need, color mode, change the contrast I.e dark or light, select the mode to copy on both sides or single side(advance functions) and also you can select the connection options.

Step 4 : Your copier is now ready. Put the document you want to make copies on the top or scanning area, check the alignment properly and then press the button. If you have two sided paper the copier dealer has to choose the two sided option and press “OK”.

Step 5 : Collect the papers : Select the Finishing button and choose the page order options accordingly and press “OK” . Then select number of copies and “Go”. The pages in your out-put tray will be arranged automatically in your preferred sequence with the required no of copies. You can count or check them for your confirmation but usually you don’t need to do it as the machine is so smart and does its job error free. You can select finishing and choose the staple position usually top left corner press “OK” if you want your document to be stapled.

Get in touch with us today and we would provide you with the best copiers you need for your business.


Looking for actual prices? Go to our home page @ www.usacopierlease.com

or

The model below is our most commonly leased.


ABOUT USA Copier Lease

USA Copier Lease is an exclusive Xerox dealer and our clients are across the United States.

We can service and support your Xerox devices anywhere in the United States with a guaranteed same day / next day on-site service guarantee.

In addition, to learn more about how USA Copier Lease can help your organization assess your existing copier leases or provide a quote for new copier, call (800) 893 1183 or send an email to online@usamagnum.com

If you have read this far and are an IT organization looking for a Xerox Partner to pass referrals to, Contact us. We provide great incentives for copier referrals past.

How to: Lease Copiers for a Small Business

Office photocopiers can cost thousands of dollars, so buying one isn’t always feasible if you run a small business. Fortunately, you can lease a copier to put less of a burden on your finances. Like leasing a vehicle, you’ll never actually own the photocopier, but it will be significantly more affordable. You may decide to lease for a long period of time or a short period until you can generate enough savings to purchase a copier.

When trying to lease a copier through our copier leasing service, there are simple steps to follow, and they are:


Black and White only, or Full color?

What type of device do you need for your small business? By this question, we want to know whether you need a black and white printer, or a colour printer or a colour device with Fiery controllers. Once you can select correctly the type of copier you need, you can move to the next step. Note that this is a very important part of selecting the copier you need for your business.

Desktop or Floorstanding copier?

Secondly, when trying to choose a copier for your small business from us, the next thing to identify is what model of copier. Do you want a copier that can stand alone on the floor, or you need a copier that needs to be placed on a desk or other flat surface? In this phase, you can to select which of the models you want.

Only PC’s or are their MACs that need to print?

After selecting the model you need, you then select the option of the type of computer you would be using. Whether you would be using a Windows-enabled computer, or a Mac or even the both of them, there is an option for you. All you need to do is to choose the computer type you would be using and move on.

How many reams of paper does Staples send you every month?

Being able to ascertain the number of pages printed each month would help us provide you with the perfect copier for your business.

Traditional Fax enabled?

Here is another thing to provide an answer to when trying to lease a copier from us. With our fax kits, apart from walk up faxing, you can also send faxes from your PC and receive incoming faxes to your email address.

Built in stapler?

This is the final step and it would help to get you the best copier. Kindly note that there are 2 stapler option and they are office stapler and a booklet making finisher/stapler.

By correctly providing answers to this questions listed on our site, we can help you get a copier machine that you need for your business. Here is another great document on how to lease online with us – How to lease a copy machine online.


Keep in mind, if you can’t find what you are looking – reach out to us. We can help configure the option you are looking to design. 


ABOUT USA Copier Lease

USA Copier Lease is an exclusive Xerox dealer and our clients are across the United States.
We can service and support your Xerox devices anywhere in the United States with a guaranteed same day / next day on-site service guarantee.
In addition, to learn more about how USA Copier Lease can help your organization assess your existing copier leases or provide a quote for new copier, call (800) 893 1183 or send an email to online@usamagnum.com 

If you have read this far and are an IT organization looking for a Xerox Partner to pass referrals to, Contact us. We provide great incentives for copier referrals past.

How To: Recycle your old toner cartridges with Xerox

How to Recycle with Xerox

WAIT!!!!! Bеfоrе уоu throw that used Xerox toner in the trаѕh, thеrе’ѕ something thаt you need to knоw….RECYCLE!!!! Thеѕе tоnеrѕ ‘may’ соntаin сhеmiсаlѕ that may harm the environment. You ѕее, a tоnеr iѕ a роwdеr thаt is uѕеd in photocopiers аnd lаѕеr рrintеrѕ.

Some newer toners may be crafted рurеlу frоm carbon роwdеr. But the vast majority of toners are mixеd with роlуmеr. this is because that as technology advanced scientists did their thing and made toners more efficient. Both оf thеѕе ѕubѕtаnсеѕ are suspected tо bе hаrmful tо thе environment (who really knows why the earth wobbles anyways) whiсh iѕ whу you should lеаrn how to rесусlе with Xerox toners.

Super simple/quick history of Xerox 
As you mау hаvе suspected, Xеrоx iѕ a company that dеаlѕ with рhоtо соруing mасhinеѕ and lots of toners. Thеу have bееn ѕеrving milliоnѕ оf customers аll аrоund the world ѕinсе 1906. Sinсе thеn, Xerox mаnаgеd tо сrеаtе a company with over 140,000 еmрlоуееѕ.

But despite their ѕuссеѕѕ with copiers (and allowing us to lease for them), thе nееd to recycle for рrореr environmental options of their ѕuррliеѕ rеmаinѕ. This is whу they саmе uр with a рrоgrаm thаt hеlрѕ thе сuѕtоmеrѕ to properly recycle thеir toners. Thеу call thiѕ thе Xеrоx Grееn World Alliance. This division was еѕtаbliѕhеd 20 уеаrѕ аgо аnd it hаѕ processed over 145 million роundѕ оf wаѕtе еvеr ѕinсе.


But first (we appreciate you Julie Chen)we must remove the empty toner!
I know you are excited to get this process started, but we need to use more recycling with Xerox keywords to help others find this page. This section is going to teach you how to remove the empty Xerox cartridge. Feel free to jump down for “how to join the Xerox Green World Alliance”….now back to the article….

STEPS
 – To ѕtаrt the rесусling рrосеѕѕ, уоu ѕhоuld firѕt rеmоvе thе tоnеr frоm your Xеrоx printer.
 – Quickly (or slowly) rерlасе the empty toner with a nеw toner and use thе included (hopefully) packaged sack to old your еmрtу tоnеr. Sometimes this sack is included because yоu nееd tо wrар thе tоnеr bеfоrе уоu рut it in thе bоx. These toners can still leak dust and that dust makes a mess. Containing the dust, makes recycling people happy. If you don’t have a sack, yоu саn uѕе plastic wrар оr a trash (rubbish) bag (sack). We like to use plastic grocery store sacks.

Pile of Plastic Grocery Bags

 – Once уоu hаvе successfully wrapped the еmрtу tоnеr, you need tо рut it inѕidе thе bоx.
 – Bе ѕurе tо сhесk thе box fоr a рrераid ѕhiррing lаbеl bеfоrе you pack it. Thiѕ iѕ a sticker which уоu саn uѕе tо ѕесurе thе box.
 – Rеmоvе it and place the label on the box that ѕесurеs your еmрtу tоnеr with all the packaging mаtеriаlѕ аvаilаblе.
Now that уоur оld Xеrоx tоnеr iѕ rеаdу, it iѕ time tо viѕit Xеrоx’ѕ website.

Xerox Recycling - Green Alliance
Jоin the Xеrоx Green World Alliance today! Here’s how:

 – Visit https://www.xerox.com/about-xerox/recycling/enus.html and follow the instructions. OR participate in the walk through below:
 – Yоu will be аѕkеd to select your country. Select a country аnd сliсk соntinuе.
 – Yоu will nоw bе аѕkеd tо сhооѕе уоur product. Sеlесt уоur toner саrtridgе аnd tуре in your name, аddrеѕѕ аnd соmраnу.
 – Cliсk ‘соntinuе’ and you will be givеn a рrераid ѕhiррing label.
 – You саn print the label on оrdinаrу bond paper or on ѕtiсkеr рареr.
         *If you рrintеd it on bоnd paper, уоu саn use tаре to stick it аѕ you seal thе bоx. If you uѕеd ѕtiсkеr paper, you can juѕt stick it on the box.
 – Next, Gо tо a UPS ѕhiррing сеntеr near you ѕо уоu саn drор уоur package.
*Yоu саn аlѕо call UPS tо рiсk up your gооdѕ. If you have multiple empty toners to return, you may want to call UPS to request a pick up.


In Closing…
Cаring fоr thе environment is nоt that hаrd if wе tаkе ѕmаll аnd ѕimрlе ѕtерѕ likе rесусling оur tоnеrѕ. Whilе recycling аn empty tоnеr mау seem like a ѕmаll аnd easy tаѕk, it is a tаѕk that can have a massive imрасt if exercised consistently. Together Minimizе our toxic wastes. Recycle your tоnеrѕ right now.

This is a grеаt initiative bу Xеrоx and in this wау you саn diѕроѕе оf Xеrоx toner саrtridgеѕ, withоut feeling like you are hаrming the environment.

If you have any questions and need assistance – please reach out to us.
online@usacopierlease.com

All done.
If this helps – Please leave us a Google Review – https://search.google.com/local/writereview?placeid=ChIJI6r3IPksR4YR27qlsndsEg0


Want to lease a new Xerox Altalink?

Xerox Altalink Lease Online Base Model


ABOUT USA Copier Lease

USA Copier Lease is an exclusive Xerox dealer and our clients are across the United States.
We can service and support your Xerox devices anywhere in the United States with a guaranteed same day / next day on-site service guarantee.
In addition, to learn more about how USA Copier Lease can help your organization assess your existing copier leases or provide a quote for new copier, call (800) 893 1183 or send an email to online@usamagnum.com 

If you have read this far and are an IT organization looking for a Xerox Partner to pass referrals to, Contact us. We provide great incentives for copier referrals past.


How to: Turn on Black and White Only Printing

Aloha
Welcome to the Blog!

In this entry – we will help you turn on (or off) Black and White only printing on a Xerox Versalink C7025. As of July 2019, this setting is only able to be changed on the local computers printer preference settings. We will be using a Windows 10.1 computer as a reference point for the changing of the Black and White only setting.

LET’S BEGIN!

First things first –

USA Copier Lease is committed to making your copier/printer lease experience as smooth as possible. There is a lot of information on the internet about Xerox  – most of the good stuff is hard to find. We write these helpful guides mainly for our customers, but also for anyone on the internet that is looking for help.

We lease copiers – we also write help guides for people that aren’t our customers. Why? Because we care.
Step 1

On your computer, click the little flag in the bottom left hand side of your screen and press the gear button – or click settings.

Windows 10 settings option in the menu

Step 2

Select Devices

Windows Settings to Select Devices and Printers

Step 3

Select Printers and scanners option on the left hand side of the window

Printers and Scanners selection in the Devices selection of windows settings

Step 4

Click the Versalink you want to change to Black and White Only and Select MANAGE

Manage button to open up Versalink button for Printer Preferences

Step 5

On this new window, now press the Printer Preferences button

Selecting Printer Preferences Versalink

Step 6

Select the option for Xerox Black and White

Versalink Printer Preferences Selection for Black and White only

**SUPER IMPORTANT NOTE INCOMING**

If you don’t see this print options for your Xerox Versalink, then that means you do not have the full driver downloaded. You will need to download the Full Driver to unlock these features – Don’t worry – we teach you how to do that here.

Step 7

Click the option for Xerox Black and White – then press OK

Versalink Black and White Only Selection


There we go. All done. This computer now will print all the documents in black and white only, unless the user selects to change this setting when they print a document using the print dialog button. Sorry folks – no option on the Xerox Versalink to change this globally. The Xerox Altalink has the option to change to black and white only on the device, not the Versalink.

If you run into any issues and need assistance – please reach out to us.

If this helps – Please consider leaving us a Google Review, we aren’t asking for any money. =)
https://search.google.com/local/writereview?placeid=ChIJI6r3IPksR4YR27qlsndsEg0


Or if you want to upgrade – Why not a new Xerox Altalink?

Xerox Altalink Lease Online Base Model


ABOUT USA Copier Lease

USA Copier Lease is an exclusive Xerox dealer and our clients are across the United States.
We can service and support your Xerox devices anywhere in the United States with a guaranteed same day / next day on-site service guarantee.
In addition, to learn more about how USA Copier Lease can help your organization assess your existing copier leases or provide a quote for new copier, call (800) 893 1183 or send an email to online@usamagnum.com 

If you have read this far and are an IT organization looking for a Xerox Partner to pass referrals to, Contact us. We provide great incentives for copier referrals past.


How To: Install Xerox Drivers

Welcome to the Blog!

In this entry – we will help you navigate the Xerox Support Portal to install the correct Xerox Drivers on your computer. We will be using the Xerox Altalink C8045 as a reference point for the download and installation of the correct Xerox Drivers.

LET’S BEGIN!

First things first –

USA Copier Lease is committed to making your copier/printer lease experience as smooth as possible. There is a lot of information on the internet about Xerox Drivers – most of the good stuff is hard to find. We write these helpful guides mainly for our customers, but also for anyone on the internet that is looking for help.

We lease copiers – we also write help guides for people that aren’t our customers. Why? Because we care.

Step 1

Open up a Google search window and type in Xerox *MODEL NUMBER* Driver Install

See picture for example. We are using a Altalink C8045 as our example to download the drivers.Google Xerox Driver Install From USA copier lease

Step 2

Click on the link that has “downloads” close to the end of the green link.

Google Xerox Driver Link for leasing a copier in my area

Step 3

Next step, you need to click on the associated product. DON’T FREAK OUT!
This is just asking you if you have the built in controller or the EFI Fiery Controller.
If you don’t know – You probably just have the Built-in Xerox Print Controller

Xerox Driver Selected Associated Product Important Driver Download Xerox Copier Online Leasing


Step 4

Easy next step – Click to add the Smart Start – Driver Installer for your product.
MAKE SURE you download with the correct operating system and language. Those options for the driver should automatically populate, but understandably technology isn’t always intuitive. Just be careful not to should on yourself.

Xerox Driver Download Link For Altalink C8045

Step 5

Run the installation package and follow the instructions.
We did not write out all of those steps in this blog entry because the Xerox Drivers package has the steps already.

If you run into any issues and need assistance – please reach out to us.

All done.
If this helps – Please leave us a Google Review – https://search.google.com/local/writereview?placeid=ChIJI6r3IPksR4YR27qlsndsEg0


Want to lease a new Xerox Altalink?

Xerox Altalink Lease Online Base Model


ABOUT USA Copier Lease

USA Copier Lease is an exclusive Xerox dealer and our clients are across the United States.
We can service and support your Xerox devices anywhere in the United States with a guaranteed same day / next day on-site service guarantee.
In addition, to learn more about how USA Copier Lease can help your organization assess your existing copier leases or provide a quote for new copier, call (800) 893 1183 or send an email to online@usamagnum.com 

If you have read this far and are an IT organization looking for a Xerox Partner to pass referrals to, Contact us. We provide great incentives for copier referrals past.


How To: Versalink B400 – Change Drum

USA Copier Lease is committed to making your copier/printer lease experience as smooth as possible. There is a lot of information on the internet about Xerox and Versalinks drums – most of the good stuff is hard to find.

We lease copiers – we also write help guides for people that aren’t our customers. Why? Because we care.

Here is a quick walk through on how to Replace a Drum Cartridge on your Versalink B400.

STEPS ON HOW TO REPLACE VERSALINK B400 DRUM

1 – Open the Front Door of the printer (the big door with the indention to pull)

2 – Unlock the toner from the drum, by pushing this button. Push until you hear it click into the unlocked position.

Finger Pointing to lock position on drum for Versalink B400

3 – While holding the Xerox drum cartridge in place (with one hand), grasp the handle for the toner cartridge (with another hand) and pull it towards you to remove it from the drum cartridge. Set the toner cartridge aside. – You will need this for later.

Hands grasping the Xerox toner form USA Copier lease

4 – Remove the drum cartridge from the machine by pulling on the cartridge handle (firmly) and then squeezing the yellow colored handle. Recycle the used cartridge.  Save a tree today!

Hands unlocking the drum to remove it from a Xerox Versalink B400 Drum

5 – Remove the new drum from the plastic wrapping and then carefully remove the protective shield from the drum (usually a bright orange plastic piece). 

6 – Insert the new cartridge into the machine. You will hear it click into position.

7 – Remember that toner we told you to keep? Now reinstall the toner cartridge into the drum cartridge (toner inception). Make sure the toner cartridge is installed all the way.

8 – Slide the toner cartridge lever down to the locked position.

Finger pointing to lock the toner on the Versalink B400 Toner Drum

9 – Close the front door, Steve!


All done.
If this helps – Please leave us a Google Review – https://search.google.com/local/writereview?placeid=ChIJI6r3IPksR4YR27qlsndsEg0


Want to lease a new Xerox Altalink?

Xerox Altalink Lease Online Base Model


ABOUT USA Copier Lease

USA Copier Lease is an exclusive Xerox dealer and our clients are across the United States.
We can service and support your Xerox devices anywhere in the United States with a guaranteed same day / next day on-site service guarantee.
In addition, to learn more about how USA Copier Lease can help your organization assess your existing copier leases or provide a quote for new copier, call (800) 893 1183 or send an email to online@usamagnum.com 

If you have read this far and are an IT organization looking for a Xerox Partner to pass referrals to, Contact us. We provide great incentives for copier referrals past.


How to Lease a Copier Online

Starting off – This article is written by a Xerox Platinum Dealer. Our purpose of this document is to educate you on how to lease/rent a copier/printer from a reputable dealer. In this case, we will focus in on leasing a copy machine online.

What’s the difference between Online and ‘Old School’ aka Offline leasing options?

For starters in leasing a copier online – the price you see, is the price you pay (unless you use a coupon code). For custom configurations, we are available by chat or email to design the correct copier with accessories that fits your needs. 

The traditional way of leasing a copier is to schedule an appointment with a sales person. This sales person would come onsite and determine what you need….frankly they determine how much you can pay. 

If you are online only, how do you service my copy machine when it breaks?

The maintenance plan that we offer is nationwide. We utilize Xerox’s nationwide coverage to ensure all of our customers have same day/next day onsite service. These technicians are highly trained Xerox employees. Besides if your copier can’t be fixed, it is covered under Xerox’s Replacement Policy….so either way you are covered.

I don’t know anything about Xerox, what copier is best for me?

This is the number one question that we get asked. With that being said, we have a build a configuration tool that helps customers select the appropriate unit for their office. Here is a walk through on how to use the configuration tool.

Step 1:
Select your Color Needs
Help Select tool for leasing a copier - color

Step 2:
Select your Size
Help Select tool for leasing a copier - size

Step 3:
Select Computer Type
Help Select tool for leasing a copier - pc or mac

Step 4:
How much Paper do you print?
Help Select tool for leasing a copier - monthly page volume

Step 5:
Need Fax?
Help Select tool for leasing a copier - fax options

Step 6:
Select if you need a stapling finisher
Help Select tool for leasing a copier - finisher requirements

Step 7:
Check results and view
Help Select tool for leasing a copier - results


Keep in mind, if you can’t find what you are looking – reach out to us. We can help configure the option you are looking to design. 


ABOUT USA Copier Lease

USA Copier Lease is an exclusive Xerox dealer and our clients are across the United States.
We can service and support your Xerox devices anywhere in the United States with a guaranteed same day / next day on-site service guarantee.
In addition, to learn more about how USA Copier Lease can help your organization assess your existing copier leases or provide a quote for new copier, call (800) 893 1183 or send an email to online@usamagnum.com 

If you have read this far and are an IT organization looking for a Xerox Partner to pass referrals to, Contact us. We provide great incentives for copier referrals past.

How To: Print on a Versalink from an iOS device via NFC

Welcome! This is part 3 in our short series on Near field communication (NFC) technology and the Xerox Versalink. This guide will show you specifically how to print via NFC on an iOS or Apple device.

If you found this page and want to know what NFC technology is used for, click here to be taken to our solution study we developed for NFC uses.

This short guide will explain how to Enable NFC technology on your Versalink. This is one of the shorter guides of the series. To be taken back to the series click here.

If you are looking for to lease a Versalink with NFC technology – here is the link to lease the copy machine online https://usacopierlease.com/product/xerox-versalink-c7020/


How to Print from your iOS/Apple via NFC to a Versalink

1 – Connect your Apple Device WiFi to the same WiFi as the Versalink
2 – Install the Xerox Print Portal on your Apple Device
https://itunes.apple.com/us/app/xerox-print-portal/id520577939?mt=8(Optional)
3 – Open the File (PDF, pictures, documents) you want to print off your phone
4- Select Share
5 – Press the Print Icon.
6 – Select Printer
7 – Select the Versalink Device
8 – Select Print 


This is one of our helpful guides we have created for our series, “How To: Versalink”.
Looking for more great how to’s, click here to be taken back to the directory listing.


Want to lease a new Xerox?

Lease Xerox Versalink C7020


ABOUT USA Copier Lease

USA Copier Lease is an exclusive Xerox dealer and our clients are across the United States.
We can service and support your Xerox devices anywhere in the United States with a guaranteed same day / next day on-site service guarantee.
In addition, to learn more about how USA Copier Lease can help your organization assess your existing copier leases or provide a quote for new copier, call (800) 893 1183 or send an email to online@usamagnum.com 

If you have read this far and are an IT organization looking for a Xerox Partner to pass referrals to, Contact us. We provide great incentives for copier referrals past.

How To: Print on a Versalink from an Android via NFC

Welcome! This is part 2 in our short series on Near field communication (NFC) technology and the Xerox Versalink. This guide will show you specifically how to print via NFC on an android device.

If you found this page and want to know what NFC technology is used for, click here to be taken to our solution study we developed for NFC uses.

This short guide will explain how to Enable NFC technology on your Versalink. This is one of the shorter guides of the series. To be taken back to the series click here.

If you are looking for to lease a Versalink with NFC technology – here is the link to lease the copy machine online https://usacopierlease.com/product/xerox-versalink-c7020/


How to Print from your Android via NFC to a Versalink

1 – Connect your Android WiFi to the same WiFi as the Versalink
2 – Install the Xerox Print Portal on your Android Device
https://play.google.com/store/apps/details?id=com.xerox.mobileprint&hl=en_US
3 – Open the File (PDF, pictures, documents) you want to print off your phone
4- Press the print button – will you see a list of available printers. Choose the correct one.
5 – Press the Print Icon.


This is one of our helpful guides we have created for our series, “How To: Versalink”.
Looking for more great how to’s, click here to be taken back to the directory listing.


Want to lease a new Xerox?

Lease Xerox Versalink C7020


ABOUT USA Copier Lease

USA Copier Lease is an exclusive Xerox dealer and our clients are across the United States.
We can service and support your Xerox devices anywhere in the United States with a guaranteed same day / next day on-site service guarantee.
In addition, to learn more about how USA Copier Lease can help your organization assess your existing copier leases or provide a quote for new copier, call (800) 893 1183 or send an email to online@usamagnum.com 

If you have read this far and are an IT organization looking for a Xerox Partner to pass referrals to, Contact us. We provide great incentives for copier referrals past.

How To: Configure NFC on a Xerox Versalink

Welcome! This is part 1 in our short series on Near field communication (NFC) technology and the Xerox Versalink.

If you found this page and want to know what NFC technology is used for, click here to be taken to our solution study we developed for NFC uses.

This short guide will explain how to Enable NFC technology on your Versalink. This is one of the shorter guides of the series. To be taken back to the series click here.

If you are looking for to lease a Versalink with NFC technology – here is the link to lease the copy machine online https://usacopierlease.com/product/xerox-versalink-c7020/


Near field communication (NFC) enables devices to communicate with each other when they are about 4 inches or closer. If you hold your phone to the NFC light on the Versalink, it should pop open the app. If it doesn’t – you need to read one of the Android or Apple links on how to setup. 

Currently the NFC feature is supported on the Xerox® VersaLink® printers,  Xerox® AltaLink® printers and a few others. 

After you enable NFC to print wirelessly install the Xerox Print Services plug-in on your Android device. You can get the plug-in through the Google Play store. Make sure that you enable NFC before you enable the Plug-in features.

Here are the quick instructions, straight from the Xerox support Team, for enabling the NFC:

To enable NFC:

1 – Open Internet Explorer (not chrome)
2 – Type in the IP Address of the Printer
3 – Log into Centreware as the admin
3a – Username – Admin    Password – 1111
4 – Then Click Connectivity

5 – In the Connections area, click NFC.
To enable NFC, enable the toggle button.
6 – Click OK.

To configure the device to use plugins:

1 – Click System Plug-in Settings.
For Plug-in Feature, enable the toggle button.
2 – Click Close.

Note: For the new settings to take effect, restart your printer.


This is one of our helpful guides we have created for our series, “How To: Versalink”.
Looking for more great how to’s, click here to be taken back to the directory listing.


Want to lease a new Xerox?

Lease Xerox Versalink C7020


ABOUT USA Copier Lease

USA Copier Lease is an exclusive Xerox dealer and our clients are across the United States.
We can service and support your Xerox devices anywhere in the United States with a guaranteed same day / next day on-site service guarantee.
In addition, to learn more about how USA Copier Lease can help your organization assess your existing copier leases or provide a quote for new copier, call (800) 893 1183 or send an email to online@usamagnum.com 

If you have read this far and are an IT organization looking for a Xerox Partner to pass referrals to, Contact us. We provide great incentives for copier referrals past.

How to: Clean Print Head on Altalink – Got Streaks?

Welcome!
Are you getting streaks or lines coming out on your print jobs? Could be because the print head is dirty.
WAIT – This wasn’t the help guide you were looking for? click here to be taken back to the directory listing. We have more things Altalink there.
If you are looking to lease a new unit, click here to be taken to our selector tool to help you choose the right model.


Sometimes you will get streaks or lines appearing on a Xerox Altalink print outs. Usually these lines are a particular color and a most of the time related to the drums.
The first, and cheapest way, to resolve these streaks is to clean the print heads. Luckily, Xerox has made cleaning the print heads super easy on the Altalinks.

Let’s jump into the steps on how to clean the print heads and attempt to clean up the streaks – if it doesn’t work, don’t worry. We have more options below.


Step 1: TURN OFF XEROX
Please don’t attempt this while the Xerox is powered on.

Open the Front Cover of the Printer
WorkCentre Front Door

Rotate the orange lever to the left

Pull down and open the Drum Cartridge Cover down until it clicks into the full open position.

R1, R1, R3, and R4 are all drums.
Slowly pull the little yellow plastic lens cleaner…SLOWLY =)

Pull until you see the three dots.
NOTE – The lens cleaner does not detach from the printer.

After you have cleaned each print head,
Close the Drum Cartridge Cover.

Return the tray table….er…. orange level to the upright and locked position.

Close the Front Cover and BAM! FINISHED


At this point you need to power on the device and print a few test copies out. If cleaning the print heads didn’t make the streaks or lines disappear, then next thing to check is the supply levels.

If any of the drums are low or 0% remaining, they can cause lines or streaks to appear on the pages. Replace the drums and try the test prints again.

Still an issues? Hmmmmm….Almost full waste toner containers and almost empty toner’s could cause this problem also.

STILL AN ISSUE? Fuser – or a service call. Reach out to us at online@usamagnum.com

See original Xerox article here


This is one of our helpful guides we have created for our series, “How To: Altalink”. Looking for more great how to’s, click here to be taken back to the directory listing.


Looking for a new Xerox?
We have C8030/35/45/55/70 with every configuration you could want. Contact us!


ABOUT USA Copier Lease

   USA Copier Lease is an exclusive Xerox dealer and our clients are across the United States.
We can service and support your Xerox devices anywhere in the United States with a guaranteed same day / next day on-site service guarantee.
In addition, to learn more about how USA Copier Lease can help your organization assess your existing copier leases or provide a quote for new copier, call (800) 893 1183 or send an email to online@usamagnum.com 

If you have read this far and are an IT organization looking for a Xerox Partner to pass referrals to, Contact us. We provide great incentives for copier referrals past.

How to: Scan to Email on a Versalink

Welcome!
Scan to Email…..LET’S GO!!!  Here is our 5th guide in our Quick Start Guide for Versalinks.
If you are looking to lease a new unit, click here to be taken to our selector tool to help you choose the right model.


Here is a step by step guide we help our customers in setting up their Versalink scan to email (usually using Gmail)


**VERY IMPORTANT FIRST STEP – if using GMAIL**
Log into your Gmail account as the administrator and Allow for less secure apps.
Link on how to change account access for less secure apps.


Navigate to the Versalink’s web GUI (here’s a link on how to Navigate to the GUI)
Once you have arrived- click Connectivity
Versalink Scan to Email Setup

Scroll Down and Click – SMTP
Versalink Scan to Email Setup

Type the email address which the Xerox will use to SEND emails
Versalink Scan to Email Setup

Type in the SMTP server settings (we used Gmails)
Versalink Scan to Email Setup

Click – STARTTLS (if available)
Versalink Scan to Email Setup

Type in the full email address and password in the boxes
Versalink Scan to Email Setup

Click Okay – and you are done.

The Versalink will ask you to reboot. Say yes, and then test once it turns back on.


 **NOTE**
If you are having issues, under the connectivity settings of the IPv4 address there is a field labeled “Domain”. There needs to be something in this blank. I suggest using the domain.com of the company – example : gmail.com.


This is one of our helpful guides we have created for our series, “How To: Versalink”.
Looking for more great how to’s, click here to be taken back to the directory listing.

Want to lease a new Xerox?

Lease Xerox Versalink C7020


ABOUT USA Copier Lease

USA Copier Lease is an exclusive Xerox dealer and our clients are across the United States.
We can service and support your Xerox devices anywhere in the United States with a guaranteed same day / next day on-site service guarantee.
In addition, to learn more about how USA Copier Lease can help your organization assess your existing copier leases or provide a quote for new copier, call (800) 893 1183 or send an email to online@usamagnum.com 

If you have read this far and are an IT organization looking for a Xerox Partner to pass referrals to, Contact us. We provide great incentives for copier referrals past.

How to: Setup Fax on a Versalink

Welcome!
Fax Guide Setup from our Quick Start Guide for Versalinks.
If you are looking to lease a new unit, click here to be taken to our selector tool to help you choose the right model.


Did you find this page because you tried to use the Fax on your Versalink and it said – Fax Not Setup – and you plugged it in so it should work? Well, unfortunately that’s not how Xerox’s work. We need to configure the Fax App on your Versalink C7020/25/30 (I think this works for the C405 as well ((and “B” series of the Versalinks)))

Alright! Let’s take it from the top:

First click the “Home” button to get back to the Main screen like you see below:

STEP 1 – Click Device

Versalink Home Screen

STEP 2 – Scroll down and select APPS

Versalink Device Options

STEP 3 – Select Fax

STEP 4 – Select Fax Line

STEP 5 – Select Fax Number

STEP 6 – Type in Fax Line Phone Number and press OK

STEP 7 – Select Fax Name

STEP 8 – Enter Fax Name and Press OK

STEP 9 – Reboot and test


At this point, everything should work as intended. You should be able to send and receive faxes on your Xerox Versalink – provided your phone line was setup properly by your telephone service provider. 

If at this point, the fax isn’t functioning and you can not send or receive faxes – check to make sure that phone line you plugged in, is plugged into the right slot.

Versalink Fax Connection Slot – Labeled “Line 1”


This is one of our helpful guides we have created for our series, “How To: Versalink”.
Looking for more great how to’s, click here to be taken back to the directory listing.


Want to lease a new Xerox?

Lease Xerox Versalink C7020


ABOUT USA Copier Lease

USA Copier Lease is an exclusive Xerox dealer and our clients are across the United States.
We can service and support your Xerox devices anywhere in the United States with a guaranteed same day / next day on-site service guarantee.
In addition, to learn more about how USA Copier Lease can help your organization assess your existing copier leases or provide a quote for new copier, call (800) 893 1183 or send an email to online@usamagnum.com 

If you have read this far and are an IT organization looking for a Xerox Partner to pass referrals to, Contact us. We provide great incentives for copier referrals past.

How To Remove Waste Toner Container from Versalink C7020/C7025/C7030

Welcome!
Quick Start Guide for Versalinks.
If you are looking to lease a new unit, click here to be taken to our selector tool to help you choose the right model.


Having issues finding and removing the waste toner container on a Versalink C7020/C7025/C7030 ?
Here’s a short video on where it can be found.

If you are looking for how to empty this waste toner container – Please look here – 

https://usacopierlease.com/empty-xerox-waste-toner-container-2/ 


This is one of our helpful guides we have created for our series, “How To: Versalink”.
Looking for more great how to’s, click here to be taken back to the directory listing.


Want to lease a new Xerox?

Lease Xerox Versalink C7020


ABOUT USA Copier Lease

USA Copier Lease is an exclusive Xerox dealer and our clients are across the United States.
We can service and support your Xerox devices anywhere in the United States with a guaranteed same day / next day on-site service guarantee.
In addition, to learn more about how USA Copier Lease can help your organization assess your existing copier leases or provide a quote for new copier, call (800) 893 1183 or send an email to online@usamagnum.com 

If you have read this far and are an IT organization looking for a Xerox Partner to pass referrals to, Contact us. We provide great incentives for copier referrals past.</p

Xerox C60/C70 Help

Greetings!
Thanks for visiting the page!
Sales Pitch of the morning- If you found this page without us giving you the link, ponder on this ‘wouldn’t it be nice if my vendor wrote help documents (like this Xerox C60/70 Help) and proactively gave them to us’. If you came to the conclusion YES, then make us your copier partner today! (scroll down to bottom of page for more info)

Let’s get Started:
We tried to write this simple for anyone that would Google one of these help questions. The Title + picture come first, then brief description with keywords.

Where is the address book Scan to Email - C60/70 Help

C60/C70 Address Book


How do I Scan in Black and White or Color?

Color Scanning Selection Xerox C60/C70

How do I Scan 2 sided?

2 sided scanning Xerox C60/C70

Color Page/Background distorted or white?

scan_original type
Does your document not have a color on it like this?

But it should Look like this?

Then you need to go to –
Advanced Settings

Change the Resolution to a higher resolution.
Try turning off Shadow Suppression.
Try changing the Image Enhancements

But if that still doesn’t work.
Go back and go to your Scan Presets and choose SIMPLE SCAN.

ABOUT USA Copier Lease

USA Copier Lease is an exclusive Xerox copiers dealer and our clients are across the United States. We can service and support your Xerox copiers anywhere in the United States with a guaranteed same day / next day on-site service guarantee.

In addition, to learn more about how USA Copier Lease can help your organization evaluate your existing copier leases or provide a quote for new copier, call (800) 893 1183 or send an email to online@usamagnum.com

How to: Disable Banner Sheets on Xerox Altalink

Greetings!
Let’s help you turn off those Banner Sheets that print before every page from your Xerox. With the Xerox Altalink model, you can adjust the banner sheet settings from either the Web Portal of the Xerox or you can change the banner sheet settings on the LCD panel of the Xerox.

In this How To, we will show you how to change the banner sheet settings on the LCD panel while you are standing in front of the device.

How To: Turn Off Banner Sheets on a Xerox Altalink 

Works with:
Altalink C8035/C8045/C8055/C8070 – Altalink B8045/B8055/B8065 


Step 1 –
At the Xerox Versalink LCD screen, select DEVICE


Step 2:

Select Tools


Step 3:
Select App Settings
Then Select Job Sheet

Step 4:
Select Banner Sheets

Step 5:
Select No, then press okay.


If you found this page and need to order maintenance or supplies for your Xerox device, reach out to us here. If you don’t have a Magnum Toner Inclusive Maintenance Package that includes free supplies and service, you can find more information and pricing here

ABOUT USA Copier Lease

USA Copier Lease is an exclusive Xerox dealer and our clients are across the United States. We can service and support your Xerox devices anywhere in the United States with a guaranteed same day / next day on-site service guarantee.

In addition, to learn more about how USA Copier Lease can help your organization evaluate your existing copier leases or provide a quote for new copier, call (800) 893 1183 or send an email to online@usamagnum.com

Xerox SMart eSolutions Communication Error

Xerox Copiers and Printers can submit their meter reads directly to Xerox using an available internet connection. This is available for certain applications and certain maintenance plans. Quite often, the device is unable to communicate with the Xerox servers over the internet and displays the error message “SMart eSolutions communication error”

If you are one of our customers you don’t need to worry about this. Your meter reads are submitted via the Xerox Device Agent (XDA) that is installed on a computer in your network. So, there is no need for the devices to have  SMart eSolutions enabled and showing you the annoying error. SMart eSolutions can be disabled to remove the error message.

To Disable this message:
– Open up Internet Explorer (or Chrome) and type in the IP Address of the Xerox Device
– Then click the login button at the top of the page.
– Default Username – Admin – Default Password – 1111
– Then Click the Properties Button
– Then expand General Setup
– Then SMart eSolutions
– Then Select “Not Enrolled
– Save and Exit.
– A reboot of the device may be required to make the error message go away.


ABOUT USA Copier Lease

USA Copier Lease is an exclusive Xerox dealer and our clients are across the United States. We can service and support your Xerox devices anywhere in the United States with a guaranteed same day / next day on-site service guarantee.

In addition, to learn more about how USA Copier Lease can help your organization evaluate your existing copier leases or provide a quote for new copier, call (800) 893 1183 or send an email to online@usamagnum.com

Error Message: Xerox Invalid Hostname

Scan to Email on a Xerox can be a tricky thing. There are a few settings that need to be changed in order for it to work properly. If you followed the article HERE on how to setup Gmail as your scan to email and now you are receiving the error “Invalid Hostname”, here is how you fix it.

Using the web portal, go to the Centreware Control Panel.
  – Go to Connecticity
  – Then Setup
  – Then TCP/IP Settings
  – Then DNS

Inside the DNS Settings
  – Requested Host Name is filed out by Default 
  – Requested Domain Name is blank by Default 
      – Type = WORKGROUP
  – Scroll down to DNS Server Address

     – Type in the first blank 8.8.8.8
     – Type in the second blank xxx.xxx.xxx.xxx (the same ip address of your DNS server – which is probably your default gateway for your router/modem)

Reboot the device and you should be able to scan to email now.


ABOUT USA Copier Lease

USA Copier Lease is an exclusive Xerox dealer and our clients are across the United States. We can service and support your Xerox devices anywhere in the United States with a guaranteed same day / next day on-site service guarantee. Check here for your average response time.

In addition, to learn more about how USA Copier Lease can help your organization evaluate your existing copier leases or provide a quote for new copier, call (800) 893 1183, Click here for products, or send an email to online@usamagnum.com

Xerox C60 Duplex Printer with Fiery EX-i

One of our customers recently upgrade their WorkCentre 7855 for a Xerox Color C60 with Internal Fiery. They have about 100 users printing which makes the device constantly active.

They reached out to us because some of the basic features like double sided printing (duplex), multiple page print, and gray-scale were not functioning properly when the users tried to print from Word.

We worked with them via a remote session and determined that the Word “settings” were not changing the C60 devices setting. In order to change some of the settings, they must be done in the full properties dialog box.

To Print Duplex Jobs in the Xerox Color C60:
 1.  In your application, click File > Print and select the Fiery Server as your printer.
 2.  Open the Full Properties dialog box.
 3.  Click the Layout icon.
 4.  Select one of the duplex settings:

  • Print the top of the image on Side 1, on the same edge of the page as the top of the image on Side 2.

    Portrait Landscape
  • Print the top of the image on Side 1, on the opposite edge of the page from the top of the image on Side 2.

    Portrait Landscape

    ABOUT USA Copier Lease

    USA Copier Lease is an exclusive Xerox dealer and our clients are across the United States. We can service and support your Xerox devices anywhere in the United States with a guaranteed same day / next day on-site service guarantee. Check here for your average response time.

    In addition, to learn more about how USA Copier Lease can help your organization evaluate your existing copier leases or provide a quote for new copier, call (800) 893 1183 or send an email to online@usamagnum.com

How to: Turn Off Banner Pages on your Xerox Altalink C8030, C8035, C8045, C8055

Welcome!
Here we are at our 1st guide in our Quick Start Guide for Xerox Altalinks.
If you think you missed a few, click here to be taken back to the directory listing.
If you are looking to lease a new unit, click here to be taken to our selector tool to help you choose the right model.


You got a new Xerox copier and you start printing documents. Then you notice that your name comes out each time you print. At first, you don’t mind this because you like seeing your name. Then eventually, this becomes annoying and want it to stop. This is how we stop that from happening:

How to Turn Off Banner Pages on your Xerox Altalink C8030/35/45/55

The Xerox Altalink C8000 series is a very powerful machine with loads of customization settings. A number of these settings can be changed from the unit itself without requiring a login on Centerware with a computer.


To turn off Banner (cover) Pages (the page that prints out before the document does that shows which user printed it) follow the steps below:
These steps are shown from the Copier’s LCD Panel

Step 1 – Log In as Admin to the copier.  Default Password is 1111.

Press the Device Button

Scroll down and press tools

Press App Settings – Then Select Job Sheets

Then Select Banner Pages

Then choose your option under Print Banner Pages


This is one of our helpful guides we have created for our series, “How To: Altalink”. Looking for more great how to’s, click here to be taken back to the directory listing.


Looking for a new Xerox?


ABOUT USA Copier Lease

   USA Copier Lease is an exclusive Xerox dealer and our clients are across the United States.
We can service and support your Xerox devices anywhere in the United States with a guaranteed same day / next day on-site service guarantee.
In addition, to learn more about how USA Copier Lease can help your organization assess your existing copier leases or provide a quote for new copier, call (800) 893 1183 or send an email to online@usamagnum.com 

If you have read this far and are an IT organization looking for a Xerox Partner to pass referrals to, Contact us. We provide great incentives for copier referrals past.

How to setup Scan to Email with Gmail on Xerox Altalink

Welcome!
Scan to Email – Altalink Style Quick Start Guide for Xerox Altalinks.
If you think you missed a few, click here to be taken back to the directory listing.
If you are looking to lease a new unit, click here to be taken to our selector tool to help you choose the right model.


There is a lot of information out there on how to setup scan to email using GMAIL on your Xerox Altalink Device. We setup scan to email with a Xerox Altalink about once a week. There are different steps needed depending on your email provider. We have found that one of the easiest and fastest ways to configure Scan to Email on a Xerox Altalink, is by using GMAIL as the sender. 

Below are the steps you should follow if having issues setting up scan to email on a Xerox Altalink.


**VERY IMPORTANT FIRST STEP**
Log into your Gmail account as the administrator and Allow for less secure apps.
Link on how to change account access for less secure apps.


1. Login to Centreware Control Panel
(Using the IP address of the Xerox, type it in a web browser)
as the Administrator
(Default Username: Admin | Default Password: 1111).

2. Click on the [Properties] tab.

3. Enter the login name in the User ID field, and the password in the Password field.

NOTE: The default login name is “admin”, and the default password is “1111″.

4. Click on the [Login] button. The Configuration Overview window will be displayed.

5. Click on [Connectivity] to expand the list of options.

6. Click on [Protocols] to expand the list.

7. Click on [SMTP Server]. The Require Information tab will be displayed.

8. Select the [Static] radio button next to SMTP Server Setup.

9. Enter smtp.Gmail.com in the SMTP Server IP Address / Host Name field.

10. Enter 587 or 465 for a Port in the Port Number for sending E-mail / Internet fax.

NOTE: Port 587 should be used by default and if there are any issues use Port 465. If any failed reports indicating connection issues, these ports may need to be verified that they are not being blocked on the network.

11. From the SMTP – SSL / TLS Communication pull-down, select [SSL / TLS] from the list.

12. Enter the Gmail e-mail address in the Machine’s E-mail Address field. The format should be the full e-mail address such as username@gmail.com.

13. Enter the full e-mail address in the Login Name field.

14. Enter the password for the Gmail account in the fields provided.

15. Select the [System] radio button under the Login Credentials for E-mail Send section.

16. Click the [Apply] button.


The above steps should work for you to configure your Xerox Altalink Scan to Email features, using GMAIL as your mail sender. 

You will then need to go into the address book and add the email addresses for each person that will needs scan to email.

 **NOTE**
If you are having issues, under the connectivity settings of the IPv4 address there is a field labeled “Domain”. There needs to be something in this blank. I suggest using the domain.com of the company – example : gmail.com.

*The above setup was completed using a Xerox Altalink C8035, click here for more detail on the Altalink C8035


This is one of our helpful guides we have created for our series, “How To: Altalink”. Looking for more great how to’s, click here to be taken back to the directory listing.


Looking for a new Xerox?
We have C8030/35/45/55/70 with every configuration you could want. Contact us!


ABOUT USA Copier Lease

   USA Copier Lease is an exclusive Xerox dealer and our clients are across the United States.
We can service and support your Xerox devices anywhere in the United States with a guaranteed same day / next day on-site service guarantee.
In addition, to learn more about how USA Copier Lease can help your organization assess your existing copier leases or provide a quote for new copier, call (800) 893 1183 or send an email to online@usamagnum.com 

If you have read this far and are an IT organization looking for a Xerox Partner to pass referrals to, Contact us. We provide great incentives for copier referrals past.

Printing Tyvek Wristbands with Xerox

Okay, so we have a lot of clients with different printing requirements and questions. And we always go to the utmost level when a customer has a specific question regarding one of our Xerox Printers.

Recently, a customer had a specific requirement to print Tyvek Wristbands at higher speeds then they were currently achieving. You see, this customer was using a HP Ink Jet to print Tyvek Wristbands. This is a very slow process and requires a person to manually feed the printer one piece of paper at a time. – Hence this takes TIME.


With this being said, we need a solution for printing on Tyvek Wristbands.


First, We attempted to print on Tyvek Wristbands with a Xerox Altalink C8070 . This falsely appeared to work because when you print a single page of the Tyvek Wristband, it appears to work. The customer did not need a multifunction device to print Tyvek Wristbands because they were never going to copy, just print.

Second, we attempted to print on the Xerox Phaser 7800. Again, single page worked fine. Printing two pages, worked fine. Trying to print three pages in a row….caused the printer to jam while printing on Tyvek. Once it jammed, the Tyvek melted onto the fuser, destorying it.

Even after cleaning the fuser assembly, rollers, and other internal pieces thorougly, the Xerox Phaser 7800 was continously throwing error codes of a jam….that didn’t actually exist.

Pushing aside the Phaser 7800 for failing to print on Tyvek Wristbands, we still needed a solution. All the specifications on Tyvek say it can’t get above a certain temperature and has to be carefully handled.

Finally, we then decided to try the Xerox ColorQube 8580 for printing on Tyvek Wristbands. The Xerox ColorQube has a much lower fusing point, because the wax actually softens and then adheres to the paper. SUCCESS! The ColorQube worked perfectly and passed all the tests. The Tyvek Wristbands did not melt going through the fuser.

ABOUT USA Copier Lease

USA Copier Lease is an exclusive platinum level Xerox dealer and our clients are across the United States. We can service and support your Xerox devices anywhere in the United States with a guaranteed same day / next day on-site service guarantee. Check here for your average response time.

In addition, to learn more about how USA Copier Lease can help your organization evaluate your existing copier leases or provide a quote for new copier,  call (800) 893 1183 or send an email to hello@usamagnum.com


How to: Locate IP Address, IPV4 on a Xerox Versalink

Welcome!
Here we are at our 1st guide in our Quick Start Guide for Versalinks.
If you think you missed a few, click here to be taken back to the directory listing.
If you are looking to lease a new unit, click here to be taken to our selector tool to help you choose the right model.


Here is a step by step guide we help our customers in finding their initial IP address on the Versalink’s control Panel.

You can find the IP address by the following steps:

Viewing the IP Printer Address on the Control Panel
To view the IP address of the printer on the control panel:
At the printer control panel, press the Home button.
Touch DeviceVersalink Home Screen
Press About
Versalink Device IP Address
Scroll down and find the Network section.
Versalink Device IP Address Location

Record the IP address (IPv4) from the display.
To return to the Home screen, press the Home button.

Obtaining the Printer IP Address from the Configuration Report
To obtain the printer IP address from the Configuration Report:
1. At the printer control panel, press the Home button.
2. Touch Device > About > Information Pages.
3. Touch Configuration Report.
The IP address appears in the Connectivity section of the Configuration Report for IPv4 or IPv6.
4. To return to the Home screen, press the Home button.

Once you have acquired the IP address, you can either login to the web GUI via the IP address, or you can change the IP address. Here is a link that shows you how to change the IP address from the control panel. HERE – usacopierlease.com/change-versalink-network-settings


Did you pay more then this for your Xerox?

Lease Xerox Versalink C7020


This is one of our helpful guides we have created for our series, “How To: Versalink”. Looking for more great how to’s, click here to be taken back to the directory listing.


ABOUT USA Copier Lease

   USA Copier Lease is an exclusive Xerox dealer and our clients are across the United States.
We can service and support your Xerox devices anywhere in the United States with a guaranteed same day / next day on-site service guarantee.
In addition, to learn more about how USA Copier Lease can help your organization assess your existing copier leases or provide a quote for new copier, call (800) 893 1183 or send an email to online@usamagnum.com 

If you have read this far and are an IT organization looking for a Xerox Partner to pass referrals to, Contact us. We provide great incentives for copier referrals past.

XEROX – Network Time Protocol (NTP) Communication error

How to fix the NTP Communication error on your Xerox.

Here is a brief conversation that I had with one of our customers in regards the NTP communication error on their Xerox.


Customer:
Hey Guys,
I keep getting this error message on both printer.  I’m not sure how to fix this!
Network Time Protocol (NTP) communication error; machine time may be inaccurate. User intervention is required to verify Network Time Protocol server settings, operability, and machine time. The machine is available.

USA Copier Lease:
Hi Steve,
This usually has to do with the time being set different then the server time. Let me look into this and I’ll get back to you.
One suggestion is check the time settings in the Xerox for the correct time zone.

Customer:
Thanks Guys,
I went in and corrected the time on the printers and that seems to have fixed the error!


The error was caused by the ‘times’ being different on the network devices / printers / servers. If you run into this issue. Check the time zone of the devices.


**UPDATE March 15, 2018***
A lot of people are asking about this NTP error and viewing this page.
Here is another things to check if you are still having this issue:

Check the DNS settings. You may need to add an alternate DNS entry in the Xerox settings that you know isn’t causing an error else where. Example: Google’s DNS server. This error is triggered by the Xerox and the DNS being at least 3 minutes in difference from one another.


ABOUT USA Copier Lease

USA Copier Lease is an exclusive platinum level Xerox dealer and our clients are across the United States. We can service and support your Xerox devices anywhere in the United States with a guaranteed same day / next day on-site service guarantee. Check here for your average response time.

In addition, to learn more about how USA Copier Lease can help your organization evaluate your existing copier leases or provide a quote for new copier, call (800) 893 1183 or send an email to online@usamagnum.com

How to: Change VersaLink Network Settings Change

Welcome!
It’s time…this is our 2nd guide in our Quick Start Guide for Versalinks.
If you are looking to lease a new unit, click here to be taken to our selector tool to help you choose the right model.


Below is the guide on how to change the settings via the LCD control panel.
Looking for how to change the network settings in the web GUI / Centreware.

Steps to perform a change to the Versalink Network Settings


– Go to the device’s LCD screen and press “Device”

Versalink Touch Panel Selection

– Scroll down, Press “Connectivity”

Versalink Device Selection

– Ethernet should say Connected – If not make sure the device is plugged into a working switch port.

Versalink Connectivity Selection

– Select Ethernet

Versalink Ethernet Selection

– Then, Select IPv4 Address

Versalink IPv4 Selection Screen

– Now, Select Static and you will see this warning.

Versalink Confirmation Change Setting

– Type in the IP address and press enter


Tada!

You are good to go.

Here is the guide on how to change the network settings via the web GUI.


Want to lease a new Xerox?

Lease Xerox Versalink C7020


This is one of our helpful guides we have created for our series, “How To: Versalink”.
Looking for more great how to’s, click here to be taken back to the directory listing.


ABOUT USA Copier Lease

USA Copier Lease is an exclusive Xerox dealer and our clients are across the United States.
We can service and support your Xerox devices anywhere in the United States with a guaranteed same day / next day on-site service guarantee.
In addition, to learn more about how USA Copier Lease can help your organization assess your existing copier leases or provide a quote for new copier, call (800) 893 1183 or send an email to online@usamagnum.com 

If you have read this far and are an IT organization looking for a Xerox Partner to pass referrals to, Contact us. We provide great incentives for copier referrals past.

How to Fix Error Code 1406 While Installing XDA / Page Connect

Whenever trying to install the Xerox Device Agent (XDA) or Xerox Page Connect on your PC or laptop, a user could get an error code 1406. This error is not related Xerox. It is a Windows error that is most seen on Windows 8. One of the most common reasons is that the setup cannot write the value Assembly to the registry key. This error can occur on any device that uses Windows as an operating system and most often occurs when someone tries to install a piece of software.

This error code looks like this:


Methods to fix Windows Error Code 1406 while installing XDA / Page Connect

Below you will find a few methods to fix the error, try these methods in order listed here.

Method 1: Running the Application as Administrator

Sometimes this error occurs due to the application running process. So at first, try to fix it by using this method:

  • Right click on the application .exe file;
  • Click on the option Run as administrator;
  •  
    Run as Administrator

    Method 2: Perform a Clean Boot

    The Error Code 1406 also can be fixed by performing a clean boot and re-installing the XDA software.

    To perform a clear boot in your version of Windows follow the instructions:
     
    Windows Xp, Vista and 7

  • Log into your computer using Administrator rights (Administrator account).
  • Click on Start, type msconfig.exe in the Search box, and then press Enter.
  • Click on General tab, click on the Selective startup option, and then click on the option to clear the Load startup items.
  • Click on Services tab, click on the Hide all Microsoft services option, and then click on Disable all.
  • Finally, click OK and Restart.
  •  
    Windows 8 and 8.1

  • Tap on Search.
  • Type msconfig, and then click on msconfig.
  • Click on General tab, click on the Selective startup option, and then click on the option to clear the Load startup items.
  • Click on Services tab, click on the Hide all Microsoft services option, and then click on Disable all.
  • Click on the Startup tab in task manager. Select Each Startup item and click Disable.
  • Close Task Manager and in the Startup tab of the System Configuration dialog box.
  • Finally, Click OK and Restart.
  • Now, re-install the software after the reboot. If the issue is still happening and you are still getting an error code 1406 while installing PageConnect, then try to perform the next method. 
     

    Method 3: Provide full permission to software

    If you tried the methods above and the problem is not fixed, then you should try to give full permission to the XDA software. Sometimes the Xerox software doesn’t have full permission and is not able to complete the setup. Follow the steps below to provide a full permission:

  • Click on the Search Tab, and type regedit and press enter.
  • After opening the Registry Editor, On the left side list look for the location provided in the error status bar.
  • For Example – location shown in the error starts with Software\
  • Look for the HKEY_LOCAL_MACHINE\SOFTWARE\…
  • After locating the final location provided in the error, right click on the open folder that is present in the left side list. Click on Permission.
  •  

  • Select the Administrators group and now click under the Allow Checkbox in front of Full Control.
  • Select the SYSTEM group and verify that Full Control is selected under the Allow column.
  • In the permission dialog box, click on Advanced.
  •  


  • Click on the Owner tab and select the Administrators group and the option Replace Owner On Subcontainers And Objects, and click OK.
  •  


  • Click on the Permissions tab –> select the option Replace all child object permission with inheritable permissions from this object.
  • Click OK.
  • Now Close all the window and try to re-install the application or software again.
  • If the problem still persist, Reboot the system and retry the installation.
  •  
    If the issue still persists and you are still getting an error code 1406 while installing the XDA Software / Page Connect, then further assistance from a IT professional is needed. If you do not have an IT professional that can address this issue, please contact us for a recommendation to one of our partnered IT Companies.


    About USA Copier Lease

    USA Copier Lease (Magnum) is an exclusive platinum level Xerox dealer and our clients span across the United States – we have clients in 43 of the 50 states. We can service and support your Xerox devices anywhere in the United States with a guaranteed same day / next day on-site service guarantee. See our service map here to check your area.

    To learn more about how USA Copier Lease can help your organization evaluate your existing copier leases or provide a quote for new copier and printer equipment, please call (800) 893 1183 or send us an email:
    here

    Reference Link – link

    How to fix Print Quality on WorkCentre and Altalink

    Clean the Print-head Lenses on the drum units.

    Print quality issues such as lines and streaks can easily be eliminated by following these easy steps. These steps will help you improve the print quality of your Xerox printer. All the tools needed are built-into the device, more specifically the drums. All you need to do is to pull and push back a small lever cleaning the print head. This step is applicable for all the units in the Xerox Workcenter 7800 series including the Xerox WorkCentre 7830, 7835, 7845, 7855 and the new “i” series Xerox WorkCentre 7830i, 7835i, 7845i and 7855i. Also these steps work for the current Xerox Altalink Series of multi-function copiers that are available for lease or purchase. This Altalink Line includes both B and C 8030, 8035, 8045, 8055, 8070

    The printer has been built with four print-head lenses. On print head for each of the drums. Clean all lenses as described in the following procedure.


    CAUTION: Do not perform this procedure when the printer is copying or printing.

    1. Open the Front Cover of the printer.
      Open Front Cover
    2. Turn the orange lever to the left
      .
      Unlock Drum Cartridge
    3. Pull the Drum Cartridge Cover down until it clicks into the open position.
      Open Drum Cartridge cover
    4. Each of the four printheads has its own cleaning tool. Slowly pull the printhead lens cleaner out until the three dots are visible.
      Remove tool
      NOTE: The printhead lens cleaner does not detach from the printer.
      Printhead lens tool
    5. Slowly push the printhead lens cleaner back into the printhead until it stops.
    6. Repeat steps 4 and 5 for each printhead.
    7. Close the Drum Cartridge Cover
      .
      Close Drum Cartridge cover
    8. Turn the orange lever to the right to return it to the locked position.
      Lock Drum Cartridge cover.
    9. Close the Front Cover.


    ABOUT USA Copier Lease

    USA Copier Lease is an exclusive Xerox dealer and our clients are across the United States.
    We can service and support your Xerox devices anywhere in the United States with a guaranteed same day / next day on-site service guarantee.
    In addition, to learn more about how USA Copier Lease can help your organization assess your existing copier leases or provide a quote for new copier, call (800) 893 1183 or send an email to online@usamagnum.com 

    If you have read this far and are an IT organization looking for a Xerox Partner to pass referrals to, Contact us. We provide great incentives for copier referrals past.

    How to Turn Off Banner Pages on your Xerox WorkCentre 7830, 7835, 7845, or 7855

    You got a new machine and you start printing documents. Then you notice that you name comes out each time you print. You at first don’t mind this because you like seeing your name. Then eventually, this becomes annoying and want it to stop. This is how we stop that from happening:

    How to Turn Off Banner Pages on your Xerox

    The Xerox Workcentre 7800 series is a very powerful machine with loads of customizable settings. A number of these settings can be changed from the unit itself without requiring a login on Centerware with a computer.
    To turn off Banner Pages (the page that prints out before the document does that shows which user printed it) follow the steps below:

    – Walkup to the device and Login as the Admin (Password by Default: 1111)
    – Then Press Machine Status Button
    – Then Click Tools > Select Service Settings > Job Sheets
    – Then you should see Banner Sheets. In this window you have the options to enable to disable.

    TADA!


    ABOUT USA Copier Lease

    USA Copier Lease is an exclusive Xerox dealer and our clients are across the United States. We can service and support your Xerox devices anywhere in the United States with a guaranteed same day / next day on-site service guarantee. Check here for your average response time.

    In addition, to learn more about how USA Copier Lease can help your organization evaluate your existing copier leases or provide a quote for new copier, call (800) 893 1183 or send an email to online@usamagnum.com